HOW TO ADD A FRAME TO YOUR BATHROOM MIRROR
Adding a frame to a large bathroom mirror is an easy and inexpensive way to give your bathroom an instant update. It can instantly change the look and feel of the space, making it appear more polished and stylish. Not only does it add character to the room, but it can also help protect the edges of the mirror from chipping and cracking. This is probably one of the easiest ways to do a bathroom makeover with minimal effort.
In this article, we will provide you with step-by-step instructions on how to add a frame to your bathroom mirror.

This post may contain affiliate links. If you choose to purchase a recommended product, I may receive a small commission at no additional cost to you. Rest assured that I will not recommend any product that I would not use myself. For our full policies and disclosures click here.
Measuring your Mirror for your frame
Adding a frame to builder-grade mirrors is a great way to inject some style into the room. but measuring the mirror accurately is key. Here’s an easy guide on how to measure your bathroom mirror so you can pick out the perfect frame.
The first thing you need to do is to remove any existing frames that are already around the mirror. Using the old frame is a great way to know the size of the frame you’ll need, especially if you are making the frame yourself. You can literally use the old frame for a template for the new one.
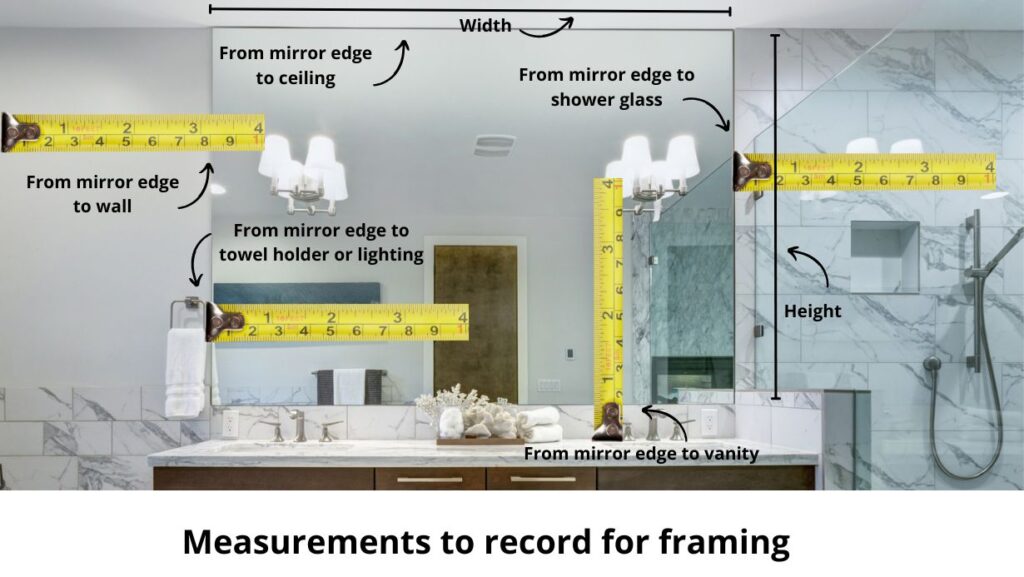
The next step, even if your using your old frame as a guide, is to use a tape measure to get an accurate measurement of the dimensions of your mirror. Measure the area around the mirror including any nearby walls, light fixtures, bathroom vanity, backsplash or countertops, and any plastic clips as well. Write these measurements down so when you’re shopping for frames you will have these measurements handy.

After that, you’ll need to decide how wide you want your frame to be. This is the measurement between the outer edge and the inside edge of the frame. You can overlap your mirror as much as you want as long as the outer edge of your frame covers the outer edge of the mirror.
Another thing you will need to consider is how the mirror is attached to the wall. If your mirror is hung with clips then mark their location on your plans. Also, mark the overhang measurement because you may want to channel out some depth so it will sit flat on the wall. See more under cutting your frame.
You will want to keep scale in mind. So basically, the larger your mirror, the thicker, wider, or chunkier you want your frame to be. There are exceptions to this rule of course. For instance, if you are framing a mirror for a contemporary or minimalist bathroom, then you will want your frame to be thin and simple.
Now that you know the measurements of your mirror and your frame size, you can start shopping.
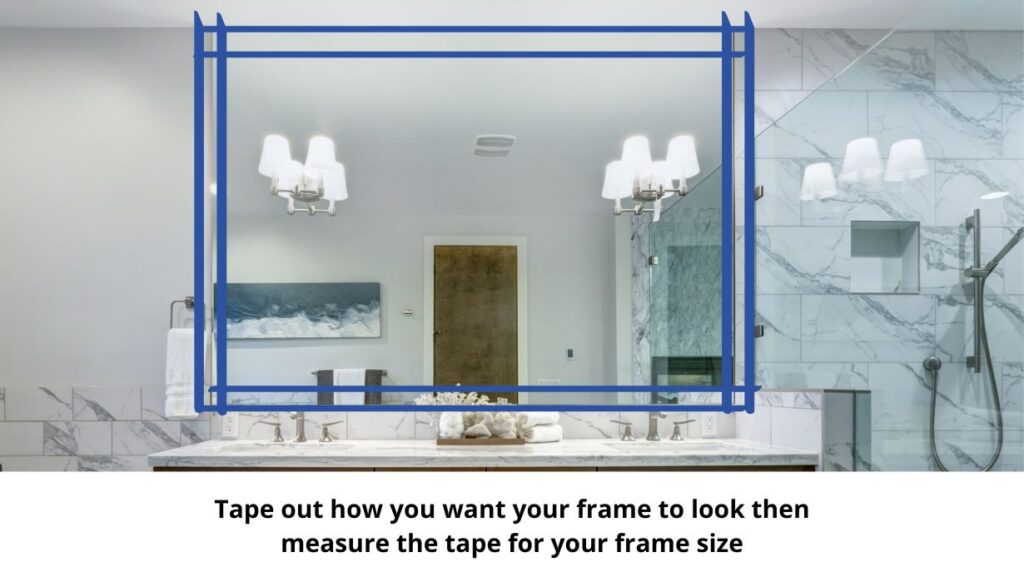
If you are doing a diy bathroom mirror frame, then an easy way to get the look you want is to use painter’s tape on the mirror and the wall. Mark out exactly where you want your frame and then measure the tape marks. This will help you decide what size boards you want to use for your frame and help you with the size of the cuts.

Choose your Frame Style
Adding a frame to your bathroom mirror can give an instant facelift to the entire room. When it comes to selecting a frame style, there are many options available. And picking one depends on the look you want to achieve.
With so many options available, choosing a style for your frame can be intimidating. To make things easier, consider your existing decor when selecting materials and colors for your new addition.
If you have modern accents throughout the space, look for geometric shapes or metal frames in bold shades like black or copper.
If you’re aiming for a simple, contemporary, and classic design, go for straight lines with minimal decorative details.
For bathrooms with more traditional elements, opt for vintage-inspired wood frames in classic white or ivory. You can also go beyond conventional designs by incorporating unique materials like rope or twine around the edges of the frame. Opt for wood if you’re looking for something with more warmth and texture.
If your style is eclectic or vintage-inspired, try something ornate with a carved border or rustic wooden accents. If you’re looking for more texture and depth, choose one with beading or other intricate detailing along its edges.
For a farmhouse style try using something with a natural texture and patina such as reclaimed wood. You could also use a black metal look or beadboard-type frame.
Whether you choose something rustic or contemporary, there are plenty of options available to suit any design style. To complete the look, add some wall sconces on either side of the mirror in order to give it even more decorative flair.
Cut and Prepare the Frame for installation
Making your own diy frame is an easy diy project to do. And nothing is better than having a custom mirror frame to show off. To start the process of adding a frame to your bathroom mirror, first, cut and prepare the frame. All you need are some pieces of wood and you can make a huge impact on the look of your bathroom.
You should use a miter saw or a miter box that allows you to make precise straight cuts at a 45-degree angle. If your mirror is rectangular or square shape then you will be making 45-degree cuts on each board. I told you how to mark out your frame with tape on your mirror above.
If you are not confident in using your own measurements, you can take your board and place it on top of the tape on the mirror. Just mark the inner and outer corner angles with a pencil so you will know where to cut.

It’s always best to err on the side of cutting your boards a little long, then cutting them too short. You can always go back and take a little off if you need to. One thing people don’t realize is that you have to consider the depth of your saw blade. Make sure you are cutting on the outside of your mark each time or your cuts will be short.
If you’re not comfortable using tools yourself, you could hire someone who specializes in carpentry instead.
And if your mirror uses little mirror clips then you will want to make a channel on the backside of the frame so that it will sit flat against the mirror. If the mirror is glued to the wall then you won’t have to worry about that.

However, if your mirror is thick then you will probably want to shave down the back of the frame that sits on the mirror so that the overlap on the outside of the mirror will sit flat against the wall. You can use a router to do this.
This really shouldn’t be a problem unless your mirror is really thick. It’s difficult to see behind the frame from the sides, especially if you have overlapped the edges a bit.
Now that you have all your frame pieces, lay them all out on a flat surface and make sure they fit together snuggly. Use wood glue and finish nails to attach each piece together. You may also want to use a square on the inside of the corners to make sure the frame is squared and not wonky. Make any adjustments as necessary then let the glue dry.
Attach the Frame to your bathroom wall or mirror
The most important step in adding a frame to your mirror is preparing the materials needed to install it. You’ll need wall anchors and screws, and either nails or a construction adhesive glue like liquid nails, or mirror adhesive depending on what type of material you choose for your frame.
Once you have collected all of these supplies, it’s time for the last step…attaching the frame. Start by making sure that the frame fits snugly around the edges of the mirror and make any adjustments necessary before securing it in place with either screws or nails.
If you’re using adhesive to attach the frame, it’s best to make sure that the mirror is clean and dry before applying it. If there are any imperfections or fingerprints on the glass, you’ll want to clean them off with a glass cleaner before putting the frame on.
You will also want to remove any excess glue from the mirror and wall. Also, if you are using adhesive make sure you put it toward the outside of the frame so you don’t see the reflection of the glue in the mirror.
Attaching your frame to your wall with screws or nails. This method is best when using a frame with at least an inch over overhang. Make sure that you have the screws and drill bit ready before you begin. If you’re using a power drill, be sure to use the correct bit for your screws.
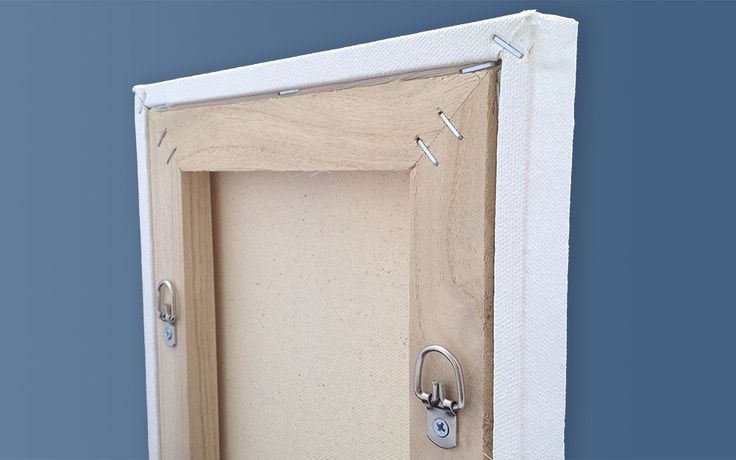
Attach your D-Ring brackets to the back of the frame on the outer edges of the frame with nails or screws. Measure down the same amount on each side of your frame so your brackets will be at the same height on each side.

Make sure you use brackets rated for the weight of your frame. Now you can attach your screws and/or anchors to the wall beyond the mirror.
Or you can simply nail the frame directly to the wall around the outside. Caution: If your nailing your frame to the wall make sure you do not nail into the mirror!
If you have a smooth frame then you can also use a caulking gun and caulk to finish off the inside and outside edges of your frame where there may be a small gap for a finished look.
Adding a frame to an old mirror is an easy and affordable way to give the room an instant style upgrade. With a few simple tools and materials, you can transform your drab bathroom into one that is stylish and modern. After following these steps, it’s time to enjoy the stylish new look of your framed mirror.


