Make a Re-purposed Floral Chandelier

I saw the cutest floral chandelier made with a tray and mason jars in a gardening magazine and I just had to make one for myself. It was so pretty and I’ve been looking for something to hang from my gazebo roof for a centerpiece. This was the perfect solution.
The next day at work. at the thrift store, a box of mason jars came in and I just knew it was meant to be.
I had to make this.

Here’s a list of the supplies I used and the cost:
1. 10 mason jars from the thrift store for $10.00
2. Round wicker tray from my house, free
3. Tin bucket from Target $3.00
4. 12′ of chain from Home Depot $5.50
5. 2 Packages of Quick Links from Home Depot $6.50
6. Bunch of floral stems from Hobby Lobby $63.00
7. Floral foam from my house, free
Obviously, the expensive part of this project is the artificial flowers. You could do this a lot cheaper if you use fresh flowers. Plus with fresh flowers, you could change it up a bit as well. But me? Well, let’s just say that I’m not the best at remembering to water my plants, so artificial is the way to go for me.
My arrangement is under my gazebo too and not getting direct sunlight so I don’t have to worry too much about the artificial flowers fading.

Step 1
The first step is to make the floral arrangement. I took a tin bucket and stuffed a piece of floral foam inside to anchor the floral stems. My preference for arrangement is a loose, casual, country-looking one so I kept this in mind when picking out my flowers. Then starting with the largest flowers first, I stuck them into the foam making sure to balance them out around the bucket.
Next is to start filling in the arrangement with the next smaller stems, and so on until you use them all. I picked out some very wispy-looking stems and used them to soften the shape by letting them stick out and hang over the edges of the arrangement. Then stuck some silk greenery around the bottom edges and a few pieces in the arrangement to fill in any remaining holes. I loved it just the way it was but I still had to make it into a hanging centerpiece.
Step 2
Next, I put the floral arrangement in the center of a wicker tray and arranged mason jars around the outside. I added some tea light candles in the jars to make the arrangement light up at night. Some of the jars already had some raffia tied around the rim so I kept it.

Step 3
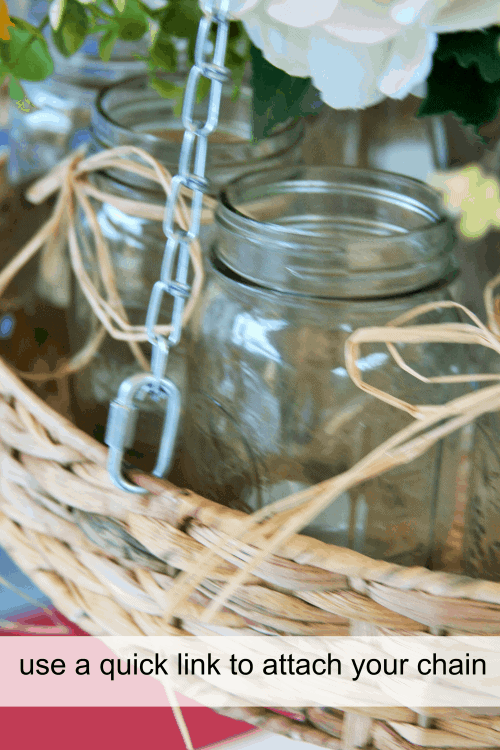
My husband cut some chains into 4-4′ sections. I attached the chain to the tray by using a quick link connector which just slipped under the rim and through the chain and twisted closed. Do this with the remaining 3 chain sections spacing them evenly around the outside of the tray. Connect them all together by using another quick link and gather them together at the top of the arrangement.

Finally, use a hook to attach the quick link to whatever you’re hanging it from and you’re finished. The whole project only took a couple of hours and I think it looks beautiful.
Related Posts…

You might like this…
Here is a beautiful garden-themed baby shower post I think you will love!


