RePurposed Farmhouse Style Planter Chandelier

I was scanning the web and saw this beautiful light fixture that was a planter built into an old wood beam for a wedding decoration. I fell in love with it. And of course, now I want a planter chandelier in my home!
So first I searched for one I could purchase. But, as usual, I couldn’t find exactly what I wanted. Story of my life! So, what do I do when that happens? I make it of course! 🙂
Read on to learn how I made a planter chandelier with my lighting contractor with this image as my inspiration.

Shop for the planter box, florals, and lighting fixture for the planter chandelier
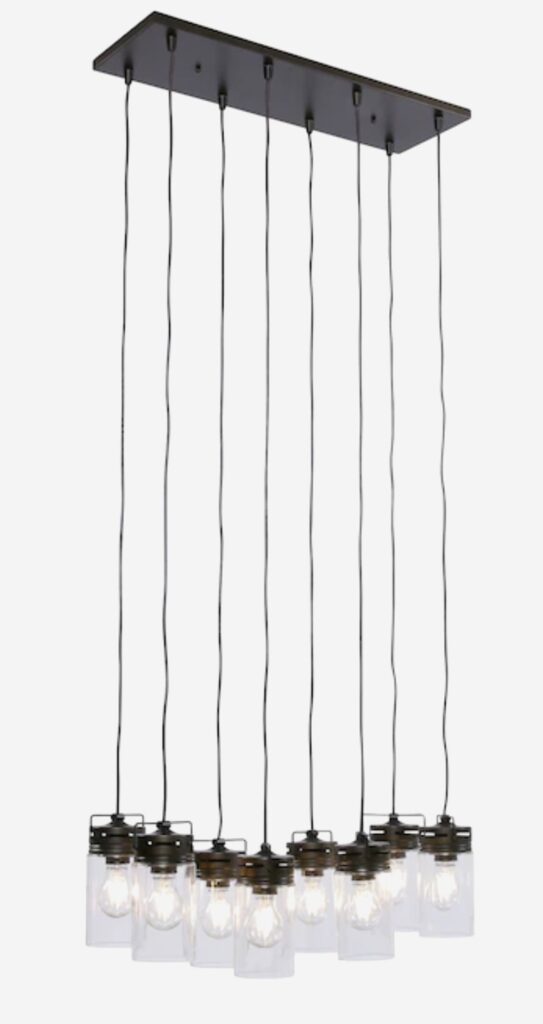
I visited many lighting stores looking for the actual light fixture I wanted to use to make the planter box chandelier. I wanted to find something simple and had the farmhouse style. I finally settled on the first one I found at Lowe’s. That always happens to me. 🙂
I needed a fixture that had a flat base that I could attach to the ceiling because my ceilings are low, otherwise, I would have just picked out individual pendants which is definitely something you could do.
Another option would have been to make a base but that was getting beyond my comfort level. Either way, I couldn’t do the planter above the base of the light so that limited my choices of the lighting fixture.
The next task for making my planter chandelier was to search for something I could use to mimic the look of the beam. I ended up using a wooden basket that has rope handles that I purchased at Michael’s. I couldn’t find the exact one I used, but you could use anything similar to the image below. This one is from Amazon but I would also look at Michael’s and Hobby Lobby.
Keep in mind that you will need to find a basket that is in proportion to your island or whatever you are hanging it over. I usually will measure the island and make the light to take up about 2/3 of that space. This is just approximate.
Next, I purchased a bunch of artificial plant stems from Hobby Lobby. I used some trailing fern-type plants, ivy, and Queen Anne’s lace. But you can use whatever you want to make it your own.
Tools you’ll need
This post may contain affiliate links. If you choose to purchase a recommended product, I may receive a small commission at no additional cost to you. This helps me to bring you this great content every week. Rest assured that I will not recommend any product that I would not use myself.

You might like this…
Check out this related post…Repurposed Floral Chandelier where I teach you how to make this adorable floral basket chandelier with mason jars and candles.
Assembling the planter chandelier
Step 1 Prepare the planter box
The first step was to drill holes in the bottom of the planter. To make sure the holes lined up with the hanging lights we used the exposed piece of the ceiling plate to mark the holes in the planter.
The ceiling plate is two pieces. One is attached to the ceiling (you won’t see this piece) and the other is a finished piece that attaches to that plate and faces down into the room. This is the one we used to line up the holes.

Step 2 String and secure the wires to the planter box
Next, we strung the wires through the holes in the basket and through the finished plate and decided how long we wanted the lights to hang. I like them being random heights so I picked the lowest hanging light and the highest hanging light and made the rest random heights in between.
We secured the wires to the planter bottom with rubber stoppers that fit into the holes. Then used black duct tape around the wires under the stopper to secure it so it wouldn’t slip out of the holes.

Then we attached the wires to the ceiling plate with the supplied locking nuts.
Hold the fixture up by the ceiling plate to make sure everything is hanging where you want it and that the basket is also hanging straight. Make any adjustments you need now.

Step 3 Do the wiring
Now we stripped and separated each wire from the top (above the ceiling plate) to expose all the wires. Then we connected all of the same colored wires together with wire nuts. Green to green, black to black and white to white.
Learn how to connect the wiring and install any fixture “and how to replace a ceiling fixture Just sign up for our mailing list below and gain access to our FREE library.


Step 4 Attach the ceiling plate
Attach the ceiling plate to the ceiling and pull the wires through the hole in the center. You will have to either have an existing box with wires in the ceiling or you will need to hire an electrician to install one for you. Make sure the box in the ceiling is heavy enough to hold the weight of the light.
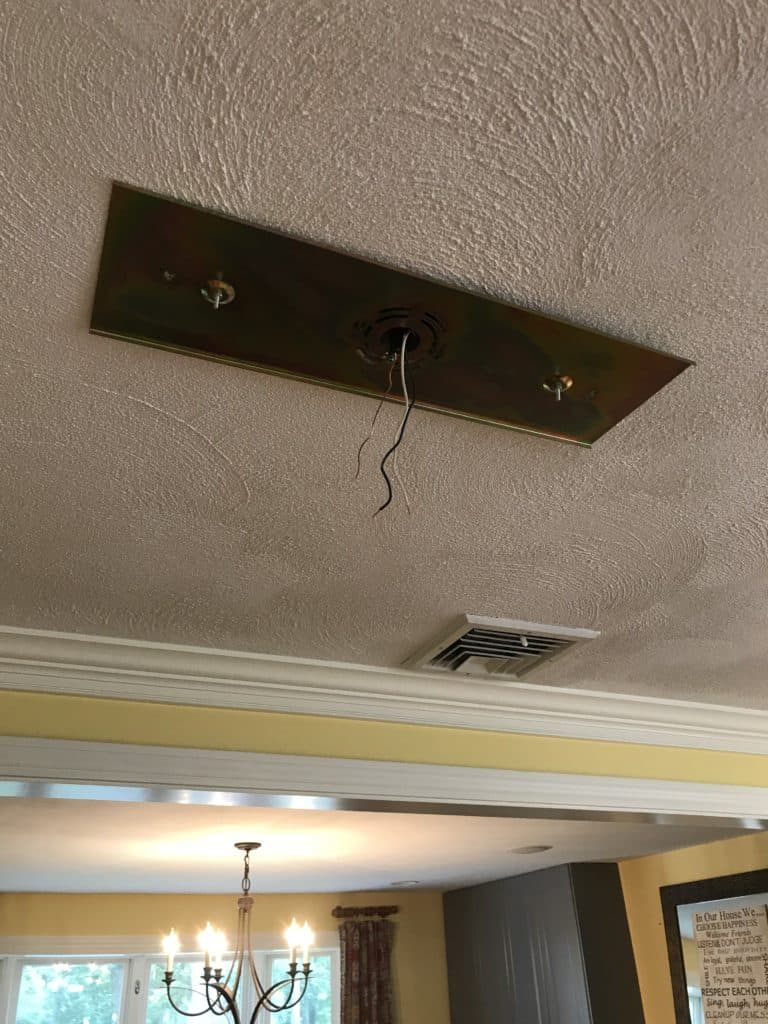
Step 5 Connect the wiring
Now you need to connect the wires on the fixture to the wires in the ceiling. Please hire an electrician to do all of the wiring unless you are familiar with electrical work.
This was by far the hardest part. You will definitely need two people. It’s very difficult to hold the fixture up near the ceiling while connecting the wires. As you can see we put a bar stool on top of the island to hold the light. I couldn’t hold it up long enough for him to connect the wires. It was exhausting!

Here is what the light looked like before we added any greens or globes. Notice the wires are hanging all wonky. This is only because it was stuffed into the box and the wires needed to relax. Also, it helped to straighten them when we added the weight of the globes and bulbs.

Design the planter box with florals and greens
Step 6 Design your floral arrangement
Add the greens and/or florals to your basket. I didn’t add anything in the basket to hold the greens, but you could always use floral foam if you like. First I stuck the hanging greens on the ends then added some soft greens on each side. Make sure to balance everything out while filling in space.
Then I added some smaller accent greens and my Queen Anne’s lace.
BTW this was not a cheap project. The light fixture that I bought from Lowe’s was expensive and whenever you are buying artificial flowers it can be pricey. Not to mention, I hired my electrician to help me put it all together.
But you can do this for less. You can purchase inexpensive pendant lights and build a base at your ceiling to hold the lights and wires. Hobby Lobby and Michael’s always have sales on their florals so look out for sales and purchase accordingly. And of course, if you can do some basic wiring yourself then that will save you a lot!
The finished planter chandelier project in my kitchen, over my island.
It was very difficult to get good-quality pictures with all of the light bulbs but I did my best.

I hope you enjoyed my project on how to make a repurposed farmhouse-style planter chandelier. If you have any questions or comments please leave them below. Thank you
Related Posts…







HI there, love the chandelier but would want to use real plants and I know that is a different story .
I noticed the rustic cat condo in the background – would like to know about that.
Thanks Victoria
Thanks Victoria. I would be afraid to use real plants only because of watering them with electrical wires running thru them. But you could put the plants in separate pots and take them down to water them I guess.
The cat tree in the background I made from some birch branches, baskets, and wood crates. You can read more about it on my catio post at https://www.ourrepurposedhome.com/build-a-pvc-catio/
Lori
Hi Lori!
Planter is gorgeous!
Did you use any real plants or are all artificial? How many artificial plants did you use?
Beautiful work!
Thank you Lili, I only used artificial plants because I can’t keep a plant alive if my life depended on it! LOL I used all bushes. Some were hanging bushes and some were more condensed. Then I stuck in a few Queen Anne’s Lace stems.
Marvelous!!!!!
Beautiful!!!
Creative!!!
I loved your idea!!!!!
I am just confused about how you could hang the basket to not fall over the lamps. Could you please explain me it?
Thanks
We secured the wires to the planter bottom with rubber stoppers that fit into the holes. Then used black duct tape around the wires under the stopper to secure it so it wouldn’t slip out of the holes. I hope that makes sense.
Hi, this is beautiful and I’ve been wanting to do this above my kitchen island ever since I saw this https://hgtvhome.sndimg.com/content/dam/images/hgtv/fullset/2016/1/11/1/original_Jodie-Cooper-open-concept-kitchen-dining-room-with-lighting-bulkhead.jpg.rend.hgtvcom.966.725.suffix/1452565312495.jpeg, but wanting plants in the fixture too. Do you think it’s possible to do this with real plants or am I just creating a fire hazard…Thanks!
Hi Dave, Thanks for the compliment. I really couldn’t say if using real plants would be a fire hazzard. If I were you I would ask an electrician in your area to be sure.
Lori
Looks great!
Thank you Eleanor
Wow, you are so clever, Lori! It looks beautiful!
Thank you Mary